Table of contents
- 0.1 Prerequisites
- 0.2 What we will achieve
- 0.3 How to create your own coin on Binance Smart Chain Step by Step
- 0.4 Step I
- 0.5 Step II
- 0.6 Step III
- 0.7 What is solidity? 🤔
- 0.8 How does it work?
- 0.9 Step IV
- 0.10 Wait..what just happened..what’s going on 🤯
- 0.11 Solidity Basics
- 0.12 Variables.
- 0.13 Assignment and arithmetic.
- 0.14 Accessibility
- 0.15 // Simple Variable Usage – Example
- 0.16 NOTE:
- 0.17 Step I – Deploying the contract
- 0.18 Step II
- 0.19 Step III – Compiling Our contract
- 0.20 Step IV – Connecting to MetaMAsk
- 0.21 Step IV – Deploying the Contract
- 1 Don’t miss amazing tips!
Let’s have a look at how to create your own coin on Binance Smart Chain Step by Step. We will have a look at How to create your own coin on Binance Smart Chain and code the smart contract. Eventually, we will test it out to make sure it works as expected.
Prerequisites
- Have Metamask installed
- Have BSC testnet setup, check this article to do that
- Have some basic knowledge on blockchain and smart contracts
- Basic knowledge in programming and coding principles.
What we will achieve
After going through this article(hope you fully go through it:) – you will be able to create a simple smart contract on the blockchain with your own coin and test it out. Although it is on a very basic level, it’s the core of how a smart contract works. You will be able to create your own coin and transfer it back and forth to the test chain.
How to create your own coin on Binance Smart Chain Step by Step
Step I
Creating a new Project on remix
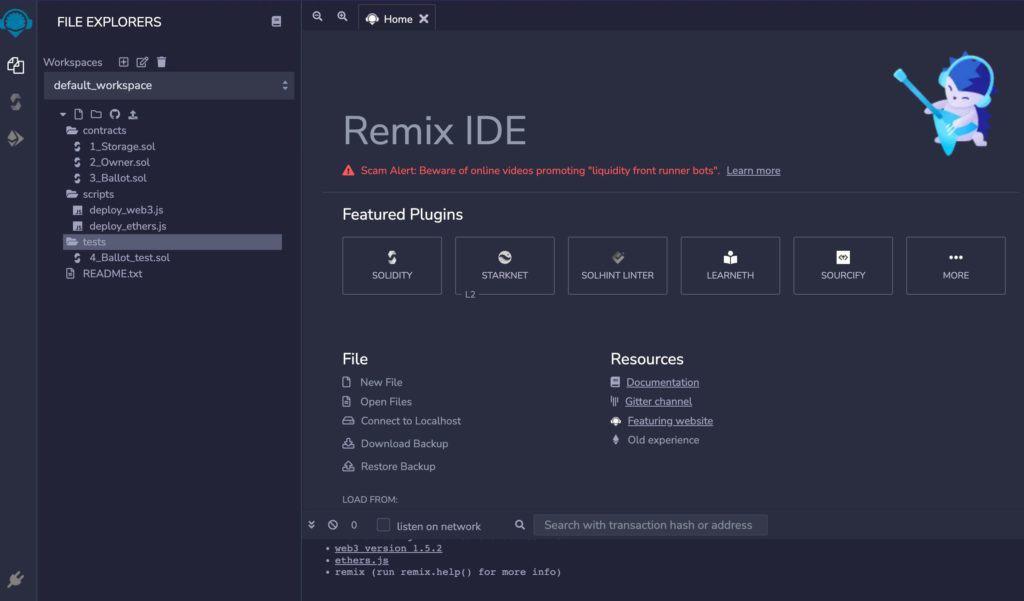
Head over to remix and open it on a new tab on your browser.
You should expect something like this on the left screenshot.
Step II
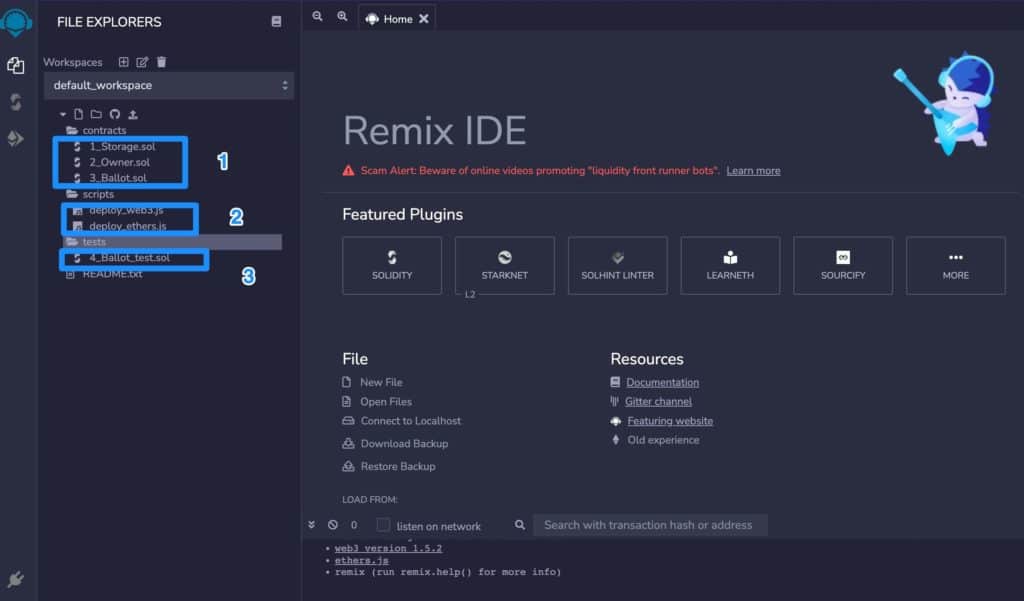
Delete all the files labelled 1,2,3 as shown.
We want to start with clean files for this demo!
Step III
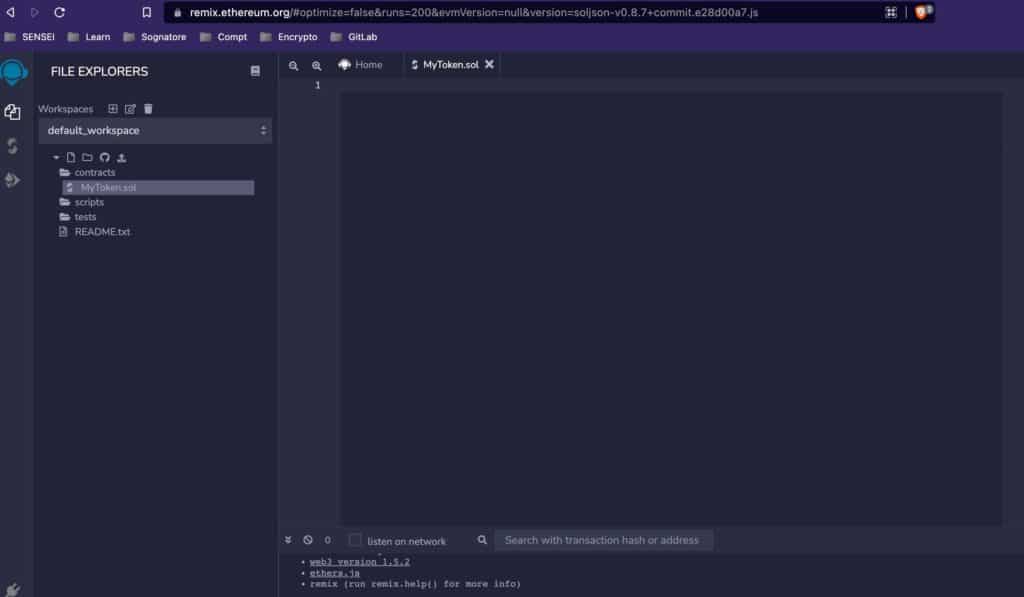
Under “Contracts” folder, create a new file called “MyToken.sol” and open it.
Great work for following up to this step! Now we are ready to start writing our code in solidity!
What is solidity? 🤔
Solidity is a javascript-like language that compiles to EVM(Ethereum Virtual Machine) bytecode. It is used to create smart contracts and their logic.
How does it work?
Briefly, solidity works in the following way: A smart contract is deployed by calling it’s address and transaction data. Once the transaction is included in a block, the contract’s code gets executed and then can be queried using an API (the query mechanism).
Step IV
Type in the contract as below.
// SPDX-License-Identifier: UNLICENSED
pragma solidity ^0.8.2;

contract MyToken {
    mapping(address => uint) public balances;
    mapping(address => mapping(address => uint)) public allowance;

    uint public totalSupply = 50000;
    uint public decimals = 18;

    string public name = "Peter Token";
    string public symbol = "PETER";

    event Transfer(address indexed from, address indexed to, uint value);
    event Approval(address indexed owner, address indexed spender, uint value);

    constructor() {
        balances[msg.sender] = totalSupply;
    }

    function balanceOf(address owner) public view returns(uint) {
        return balances[owner];

    }

    function transfer(address to, uint value) public returns(bool) {
        // Do validation with require
        require(balanceOf(msg.sender) >= value, 'remaining balance not enough');
        balances[to] += value;
        balances[msg.sender] -= value;

        emit Transfer(msg.sender, to, value);
        return true;

    }

    function approve(address spender, uint value) public returns(bool) {
        allowance[msg.sender][spender] = value;
        emit Approval(msg.sender, spender, value);

        return true;
    }

    function transferFrom(address from, address to, uint value) public returns(bool){

        require(balances[from] >= value, 'remaining balance not enough');
        require(allowance[from][msg.sender] >= value, 'remaining balance not enough');

        balances[from]-= value;
        emit Transfer(from, to, value);

        return true;
    }

}
Wait..what just happened..what’s going on 🤯
Don’t worry, we will go through the code piece by looking at the solidity basics.
When coding in Solidity, it’s important you understand the basic functions that come standard with the language. There are ten such functions, including one for handling text input and another for checking whether a variable has been assigned or not.
Solidity Basics
Variables.
a) address – stores a simple address.
b) uint – stores an integer value.
c) bool – stores a boolean value; true or false.
d) bytes – stores a byte array (bytes32). This can be used to store public information such as balances, signatures and other values that can be easily represented by one or more bytes (i.e. string).
e) string – stores a string.
f) mapping (mapping like an array but with the key-value store) – stores keyed values.
g) struct – stores a collection of fields (basically as a class).
h) function – more on this later.
i) timestamp – used to store dates in the format UNIX epoch (year, month, day, hour, minutes, seconds and milliseconds). This is usually used to represent when an event took place or is going to take place in the future.
j) event – used to describe a log of an event.
Assignment and arithmetic.
a) assignment = (equal to) operator – assigns a value to a variable (or more than one).
b) arithmetic operators
+ —> Addition,
– —> subtraction
* —>multiplication,
/ —> division
% —> modulus (returns remainder of integer division).
c) increment/decrement operators – Unary plus(++) or minus(–) operators that increase or decrease the value of a variable by one.
d) bitwise shift operators – Left shift, right shift and rotate bits.
Accessibility
a) public – denotes that this variable is accessible by anyone.
b) private – only this contract may access this variable.
c) constant – the value of this variable cannot be changed once it is initialized.
d) internal – non-external code can access these variables (i.e. only contracts created by the same code).
e) external – can be accessed by other contracts and users via transactions sent to the contract address (i.e. not created by contracts).
// Simple Variable Usage – Example
var accountBalance = 100 PETER; // Value variable with a value of 100 PETER (coins).
var balanceOfBetty = accountBalance; // Betty’s balance is now also 100 PETER.
Value variables are initialized by assignment (an expression that evaluates the desired initial value).
NOTE:
- Once defined, the variable can be accessed by its name.
- Contract accounts have their storage location on the blockchain and can be accessed by anyone who knows their address.
- Addresses are declared in a contract but can be modified anywhere.
Now that we have some basic understanding of solidity, let’s get to the more interesting bit, deploying the contract!
Step I – Deploying the contract
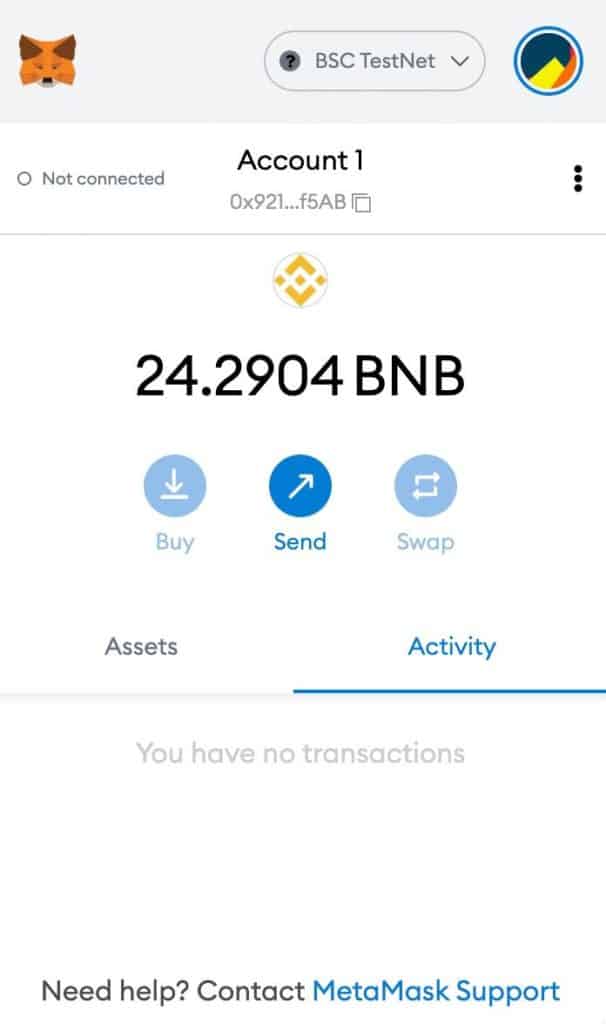
We need to ensure that we have BNB Testnet selected and we have BNB balance in our account.
Step II
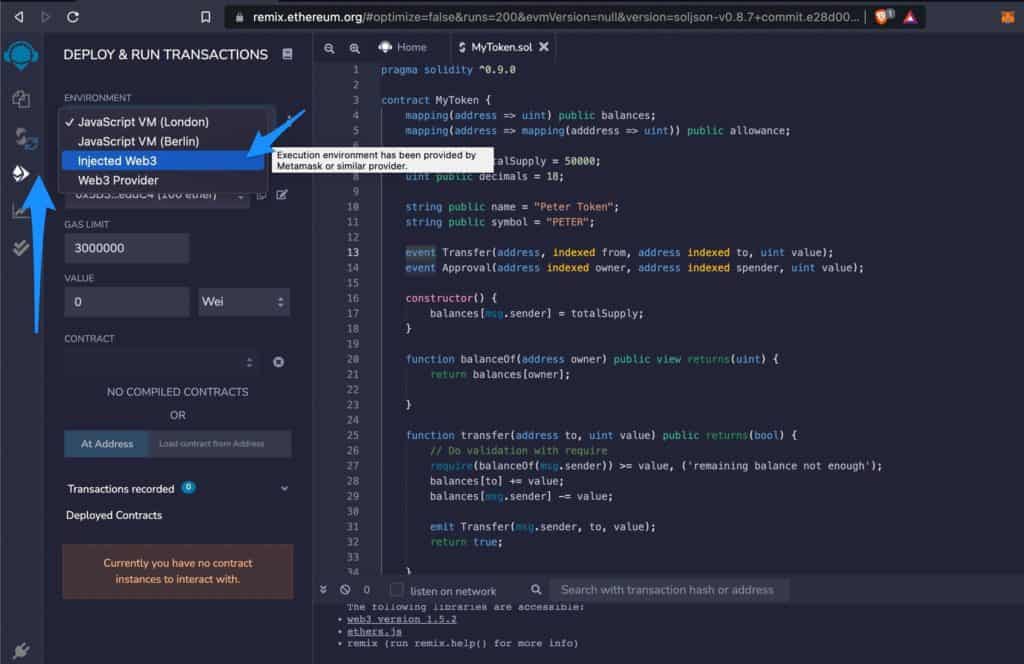
Select the deploy tab on remix, and select Injected Web3 on the Environment dropdown
Step III – Compiling Our contract
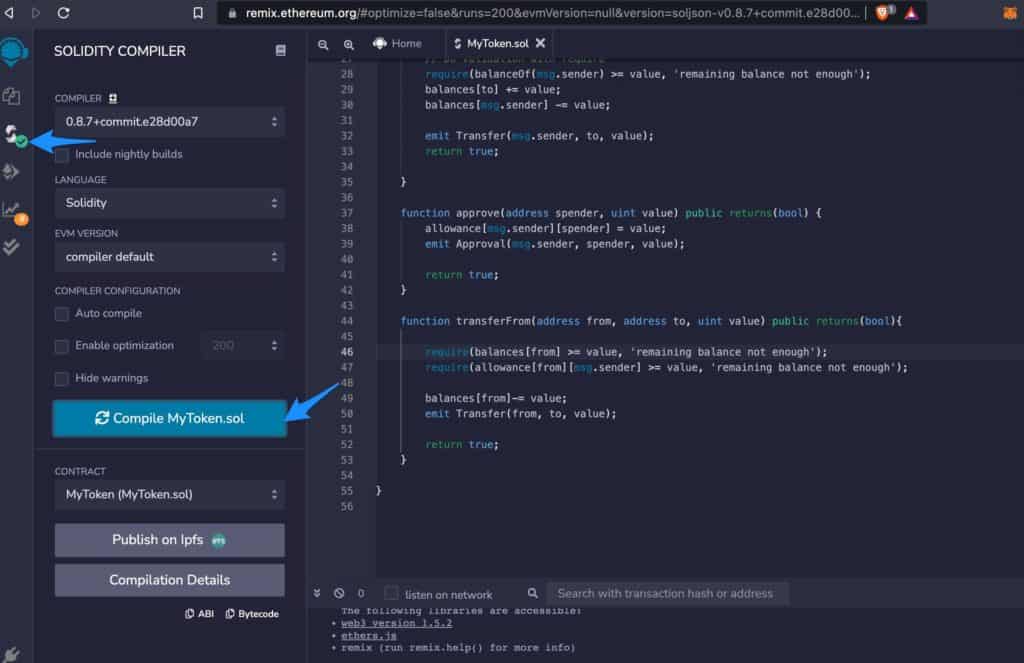
Compile the file and make sure the file compiles with no errors and there’s a green checkmark on the left.
Step IV – Connecting to MetaMAsk
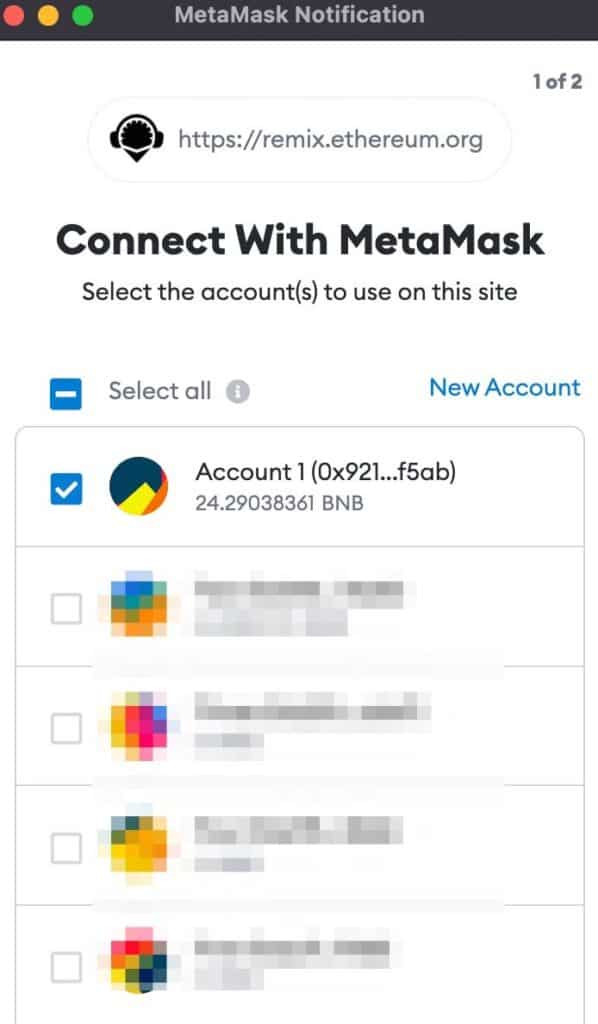
Confirm the account that has the BNBs on the BNB TestNet and click Next >> Connect
Step IV – Deploying the Contract
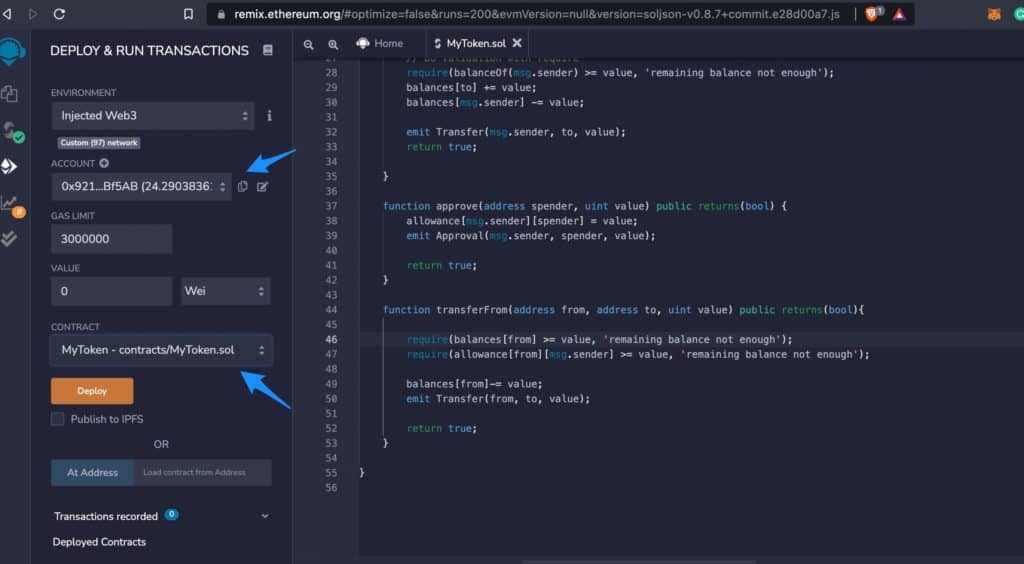
Select an account
Select the compiled Contract
Click Deploy
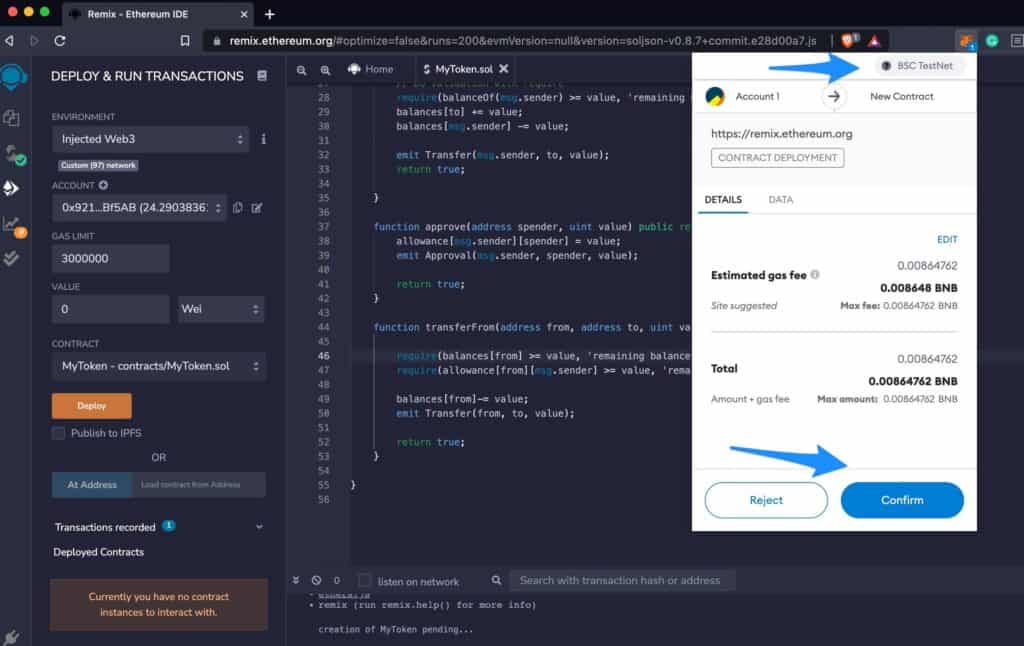
“Confirm” the transaction from the Metamask popup
Remember deploying to the blockchain requires some gas fees, hence this step is required.
The console below will give you a success message
Well done for successfully deploying your contract! Let’s interact with our contract.
Let’s look at the next article where we interact with our smart contract on the finance smart by transferring the coins to another account.