Table of contents
We are going to learn how to run JMeter tests step by step in this post as an introduction to the JMeter interface, the post does not go into details about the many things that JMeter can do, but rather gives you a quick getting started guide of JMeter. Hopefully, you have had a chance to download and run Jmeter on your machine. If not, check this article.
Prerequisites
- Have JMeter installed and running – I will be using JMeter 5.8.1
- Have an active internet connection
- We will use a sample free JSON API here for our tests to get an idea of how JMeter works
What will be covered
- Creating Test Plans
- Creating Thread Groups and Samplers
- Creating HTTP request samplers
- Creating Listeners to view results
- Increasing users to 50 and checkng results
How to run JMeter tests step by step
Step I – Creating a Test Plan in JMeter
Open a new JMeter Project test plan. You should have a GUI like the one below.

Create a new Test Plan
- Name the new Test Plan “API Test Plan”
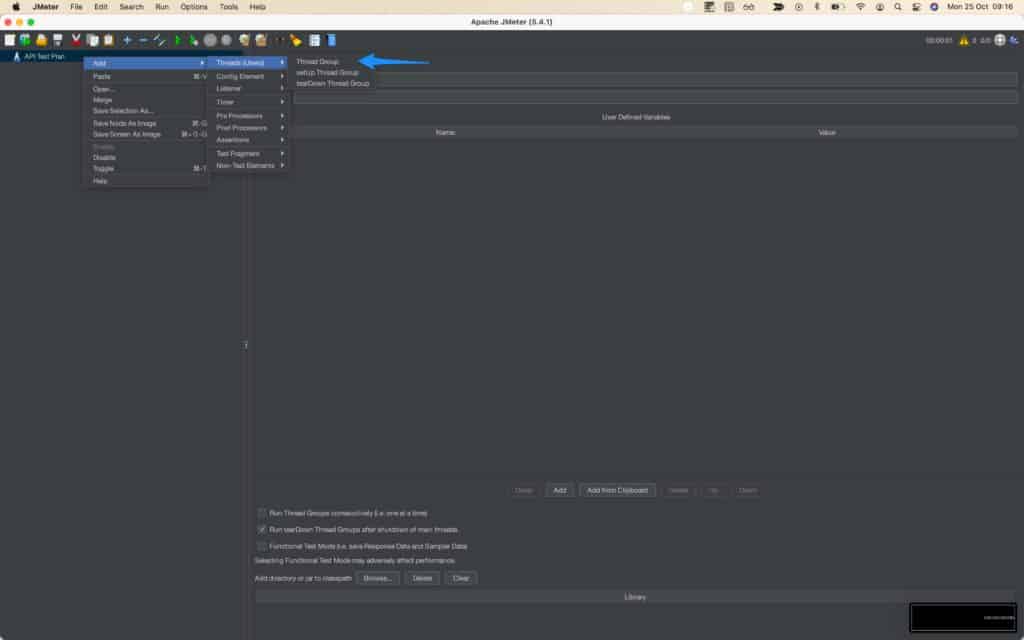
- Right click on the newly created test plan > Thread(Users) > Thread Group
- Select the Thread Group and click Add button.
- Name your thread group and select the kind of the thread you want to create, for example, API Thread Group.
- Type in a name for your Thread Group and then click “Add” button.
The Thread Group will be created with its default values: name – “Main”. The number of concurrent threads – 1.
Next we will configure this thread.
Step II – Configuring a sampler
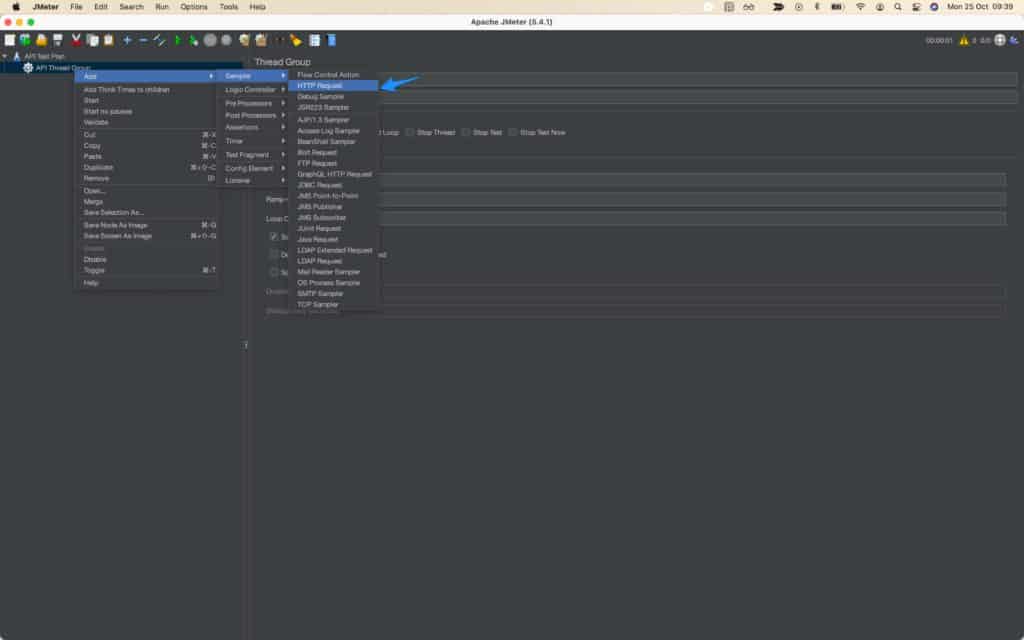
- Right click on API Thread Group > Sampler > HTTP Request – This means we will be adding a HTTP request type of sampler
- A new window will open – where we will configure our endpoint as below.
- Remember: Our reference API is here.
- Let’s start with a GET Http request, that hits this API endpoint
- 1) Let’s name our request “GET HTTP Request”
- 2) Make sure basic tab is selected
- 3) Under Web Server input https
- 4) The serverName or IP should be jsonplaceholder.typicode.com
- 5) HTTP Request should be GET
- 6) Path should be posts
Great! Our Get HTTP Request is now ready! Let’s proceed and add a listener that will display our results
Step III – Adding listeners
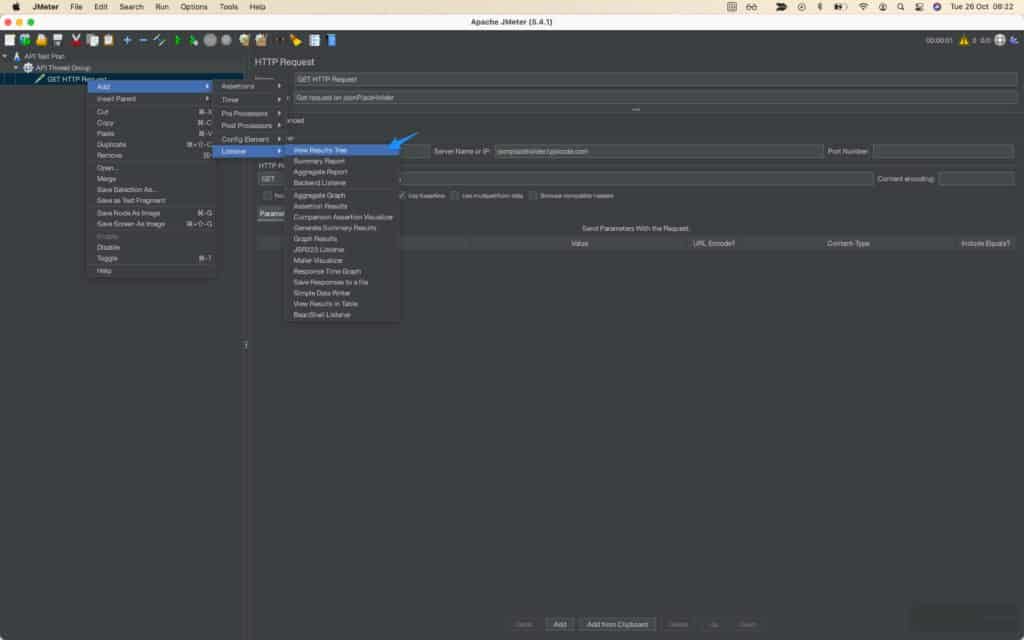
Listeners – will listen to results sent by our API and format them into a readable format such as a table or list
Right click on GET HTTP Request > Add > Listener > View Results Tree
Now we have a results tree, let’s add the second Listener – Repeat the above steps but choose > View results in table
Great, now we have 2 listeners that will display our results, let’s go ahead and run the tests.
Step IV – Running the tests
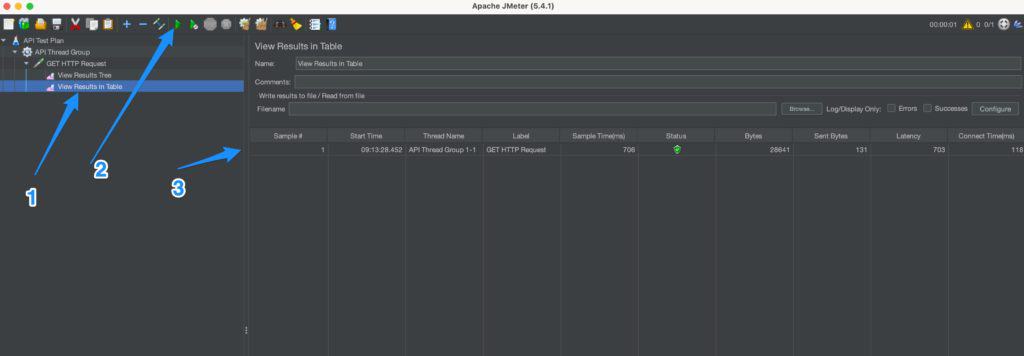
- Make sure you have View Results in Table selected
- Click the Start button as shown
- Observe our results on the details panel on the right
Congrats!
You have successfully run a single user test on our test API and got results back. Now let’s interpret the results
Interpreting the results
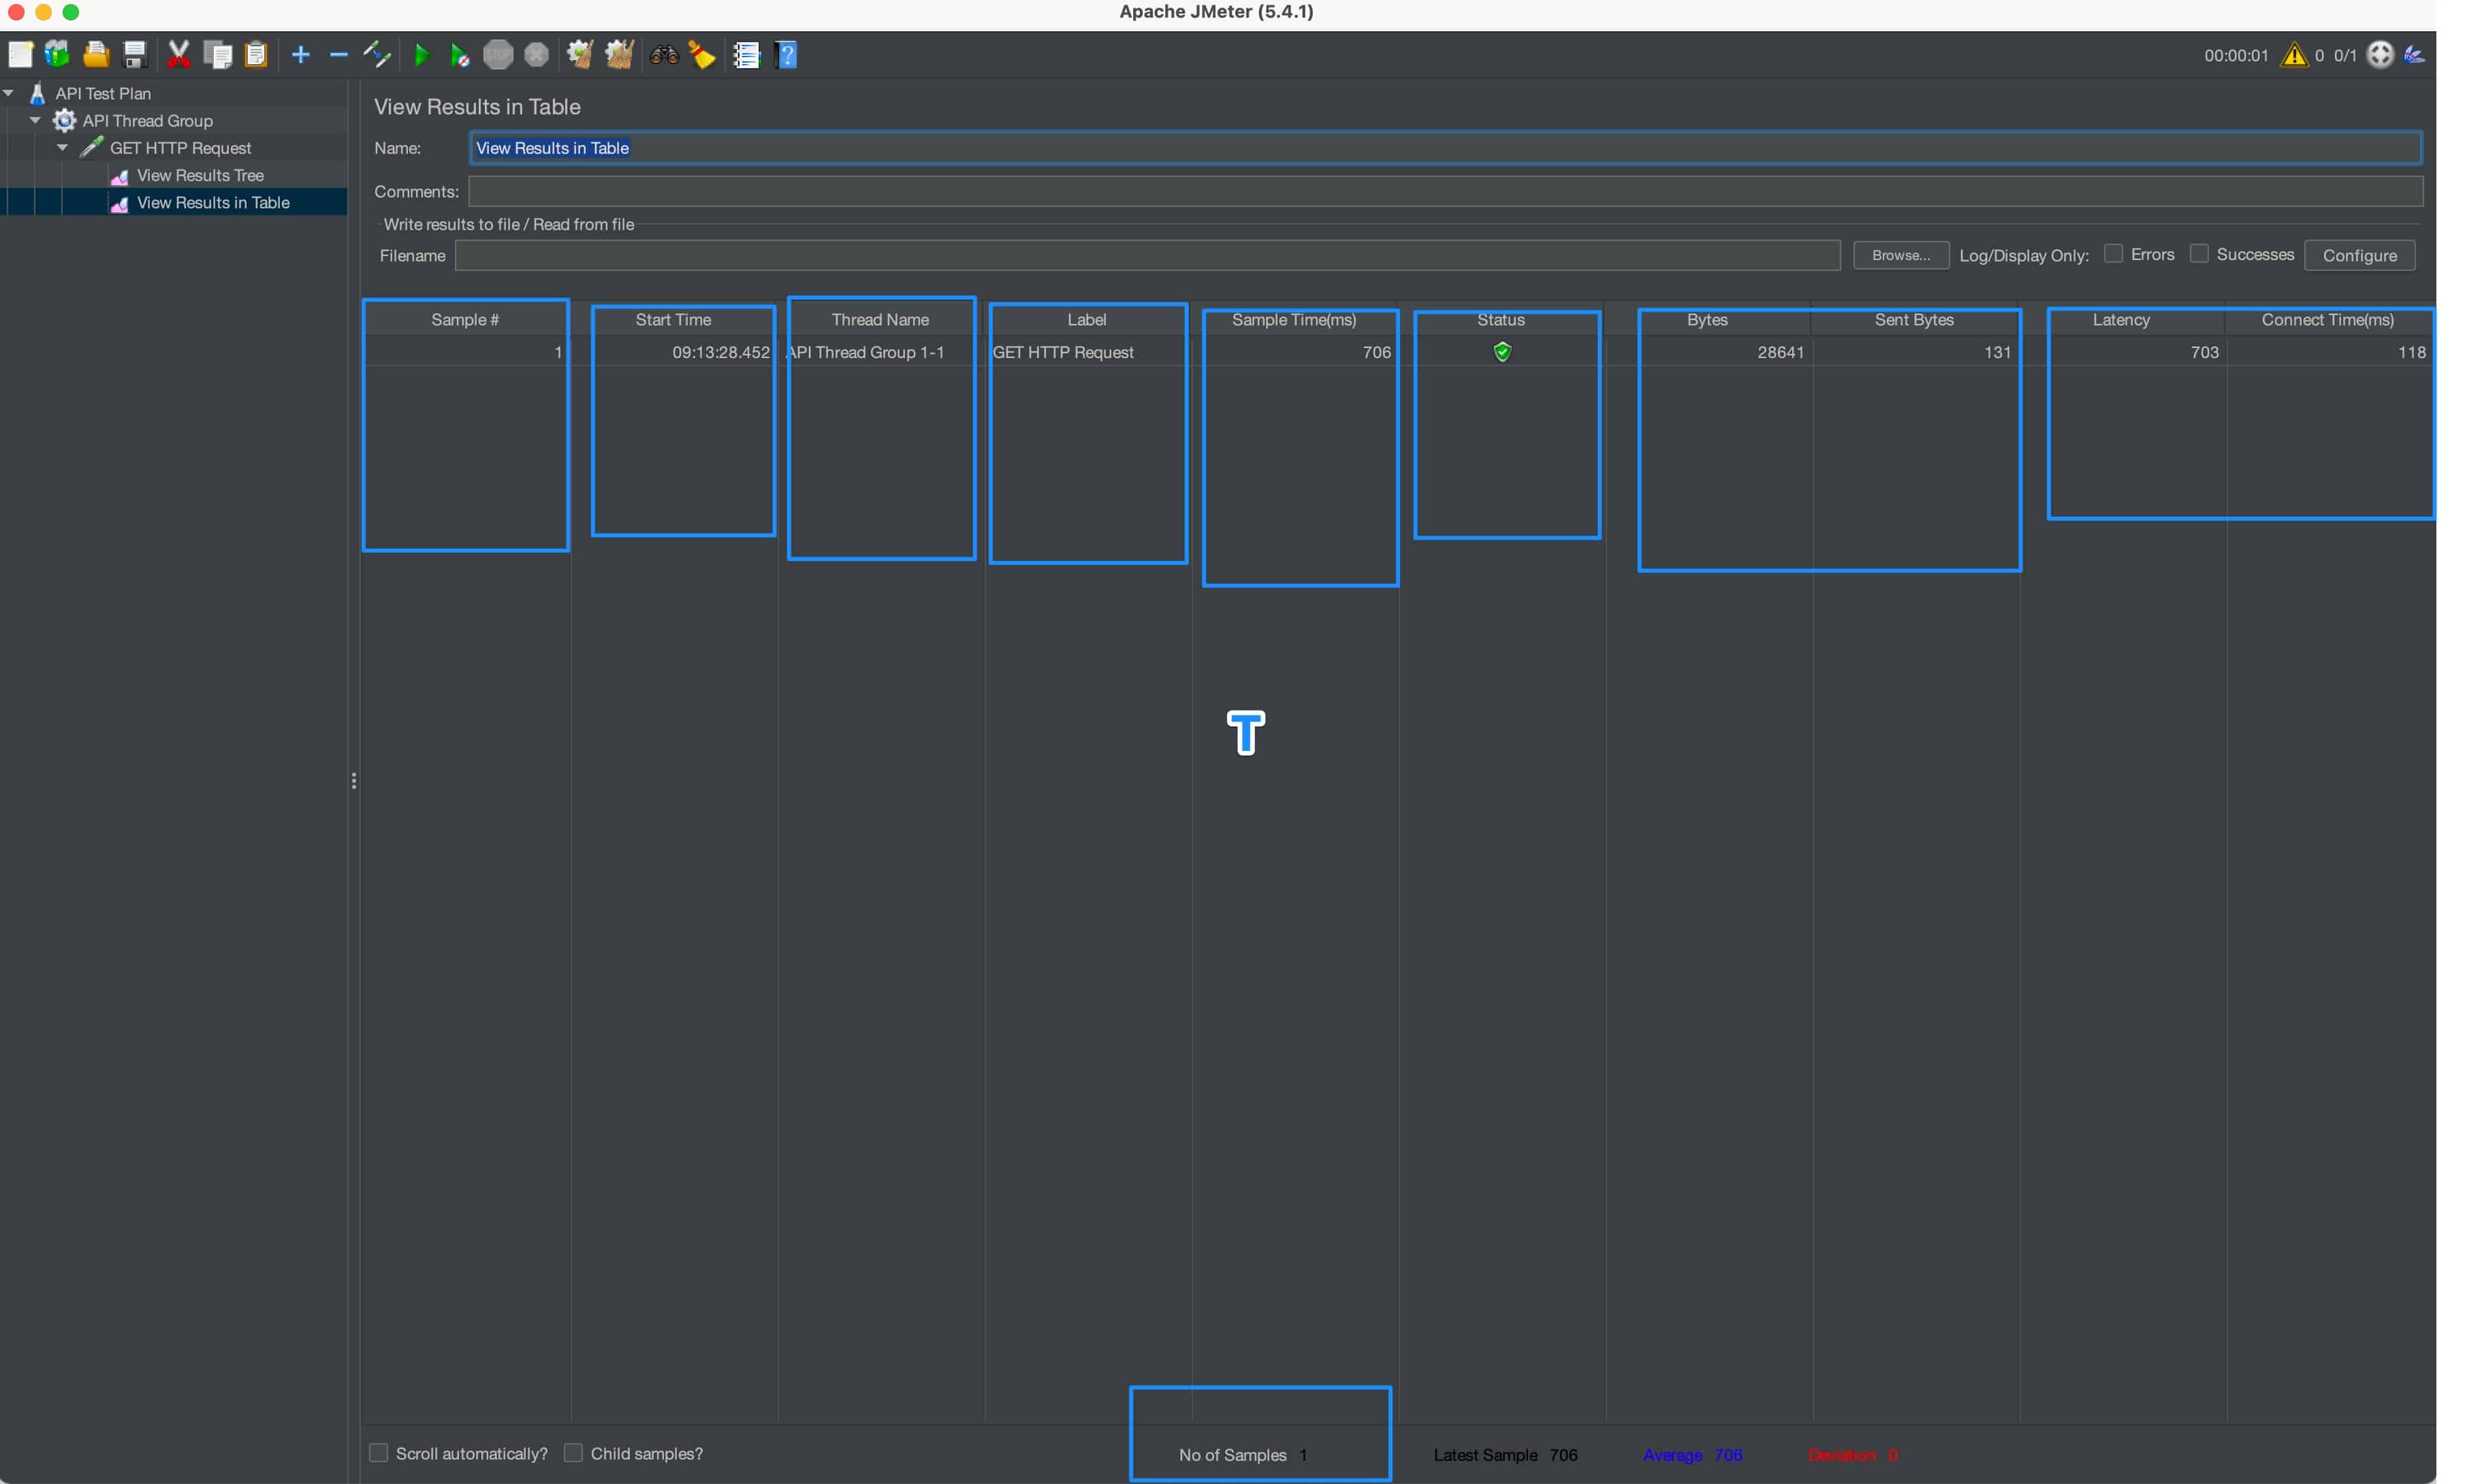
Sample - number of sample.
Start Time - is the time started to run the sampler
Thread Name - is the thread name given to that sampler request
Label - is the name of the label if Label is given in the test case
Sample Time - is the sample time taken to generate a response from each sampler thread
Duration - is the total duration of this test case
Requests - is the total number of requests made by this sampler threads
Bytes In - is total bytes received from this test thread
Bytes Out - is total bytes sent as a response from this test thread
Latency - is the average response time of each test thread
Connect Time - is the time taken for this test thread to establish connection with the web Number of samples - is the number of samples taken to run the test
Adding more users to our GET test
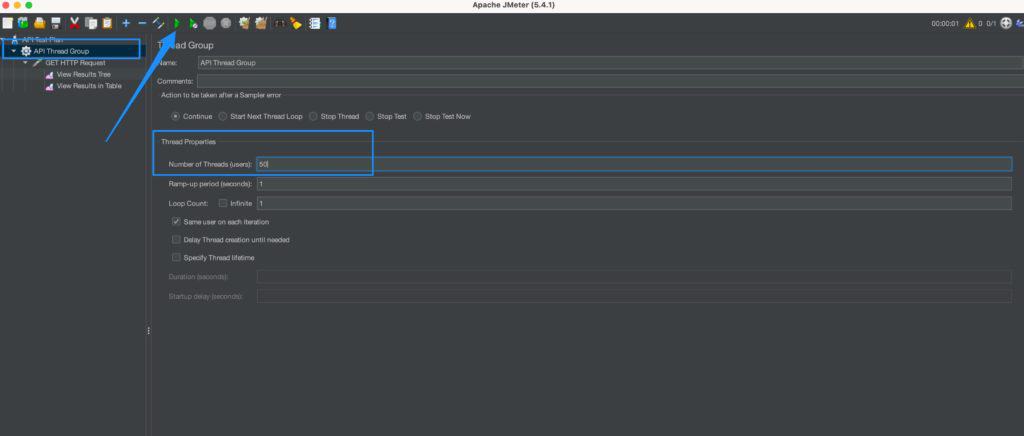
- Select API Thread group
- Change the number of users to 50.
- Click Run button
Results
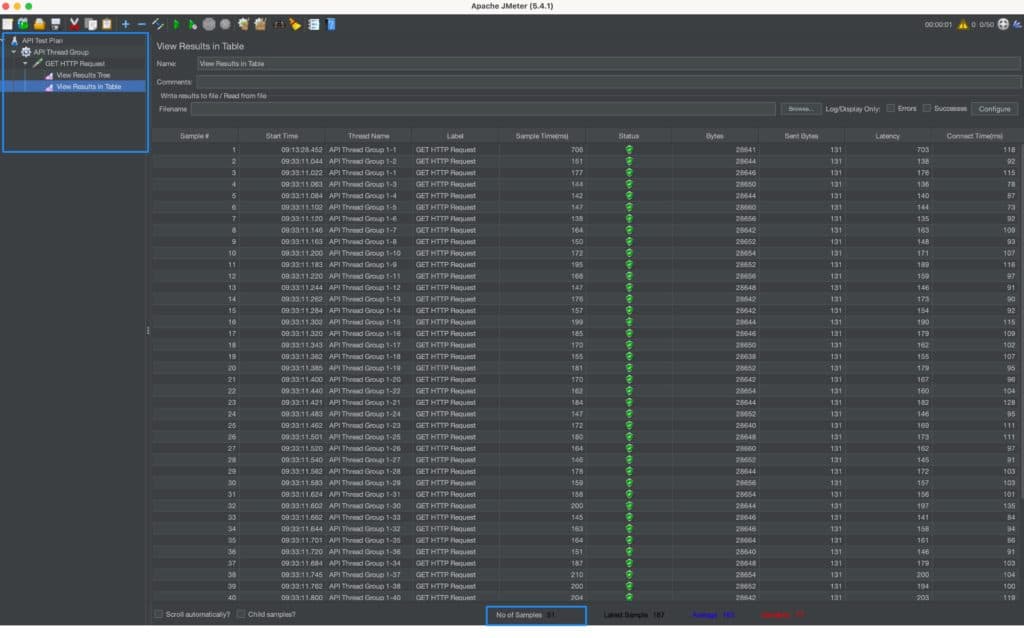
Results.
- Here we have 51 samples with their own results – simply because the first sample #1 was the one that we had ran earlier – It’s important to note that these results will build up in the results tree unless you specifically clear the results and re-run them afresh or set the results to always clear before running.
Next, sampling a POST request.
After going through the above, it’s now your chance to do the next HTTP requests – Use these sample POST and PUT endpoints to sample 50 users and get the results.