Table of contents
This blog post will teach you how to add response assertions on JMeter. If you have not installed JMeter, see How to install JMeter and run it. For a basic introduction on JMeter, read here on How To Run JMeter Tests Step By Step With Examples.
What is an assertion?
An assertion in testing is a condition that should be true for the test to succeed. JMeter has assertions to verify that the text value matches, that person exists in the system, or to check if an endpoint is alive. These are just a few of the assertions JMeter offers you.
It’s not often that when working with response assertions in JMeter, content does not match the expectations for when the assertion (a keyword) was triggered. This can lead to failed assertions or unexpected results in amplitude and latency monitoring reports. Fortunately, it is possible to fix this.
How To Add Response Assertions On JMeter
Assertion scenario
Our API returns a POST response as shown below from this URL. The following response is received.
Response
{
"userId": 1,
"id": 1,
"title": "sunt aut facere repellat provident occaecati excepturi optio reprehenderit",
"body": "quia et suscipit\nsuscipit recusandae consequuntur expedita et cum\nreprehenderit molestiae ut ut quas totam\nnostrum rerum est autem sunt rem eveniet architecto"
}
Our test assertion is to assert that
a) userId = 1
b) id = 1
| Test Case # | Test Case Description | Pre-requisites/ Special Conditions | Test Steps | Expected Results/ Acceptance Criteria | Test Results | Comments | Test duration | Test Priority |
| 1 | When the API is called, a userId = 1, should be returned as part of the response | – Call the POST get endpoint /posts/1 – Assert that userId = 1 | UserId should be equal to 1 | PASS | 2 mins | High | ||
| 2 | When the API is called, a id = 1, should be returned as part of the response | – Call the POST get endpoint /posts/1 – Assert that id = 1 | id should be equal to 1 | PASS | 1min | High | ||
| 3 |
Jmeter Assertions step-by-step
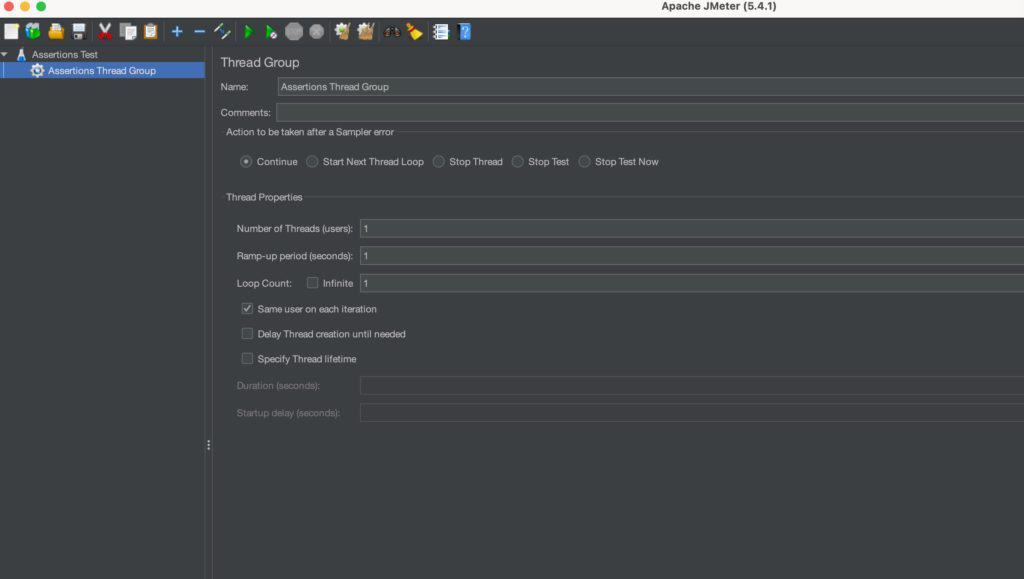
Create a new Thread group and name it Assertions Thread Group, leave all other details at default for the sake of this tutorial.
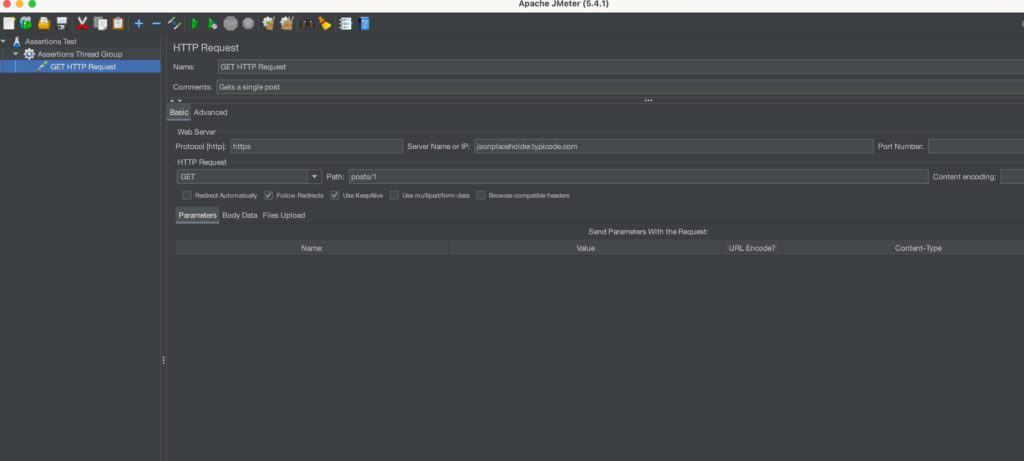
Right click on the Response Assertion > Add > Sampler > HTTP Request
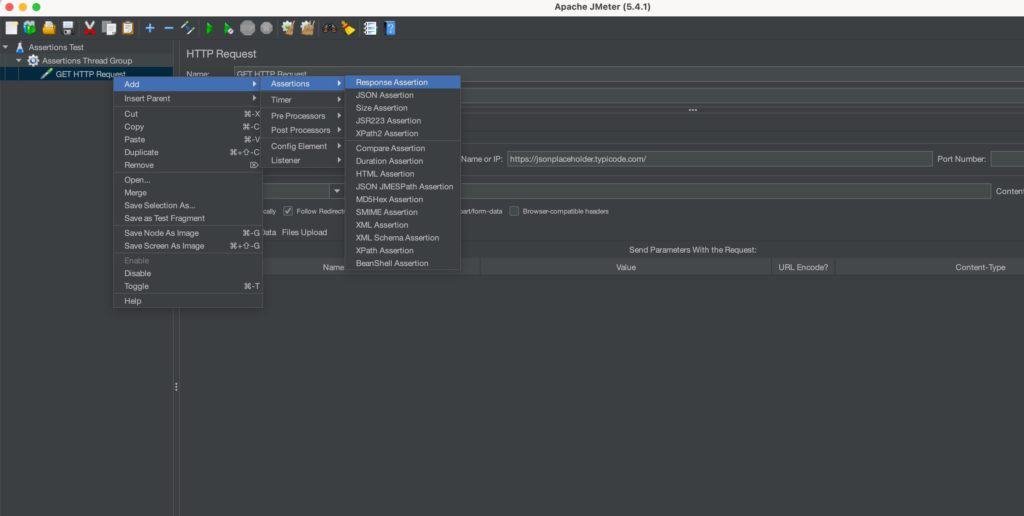
Right click on the GET HTTP Request > Add > Assertions > Response Assertion
Step II – Configuring the assertion
First, Let’s add a listener to view results
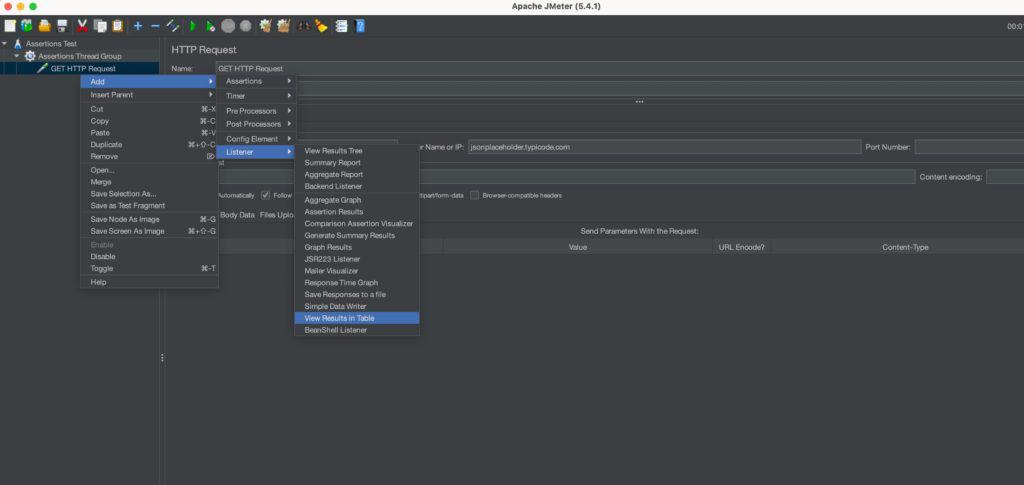
Right click on the Thread > Add > Listener > View Results in Table
We will now add the assertions for userId = 1 and id = 1.
JMeter can read the response given and check whether the test response given contains the assertions we want.
We do that by configuring the assertions as below.
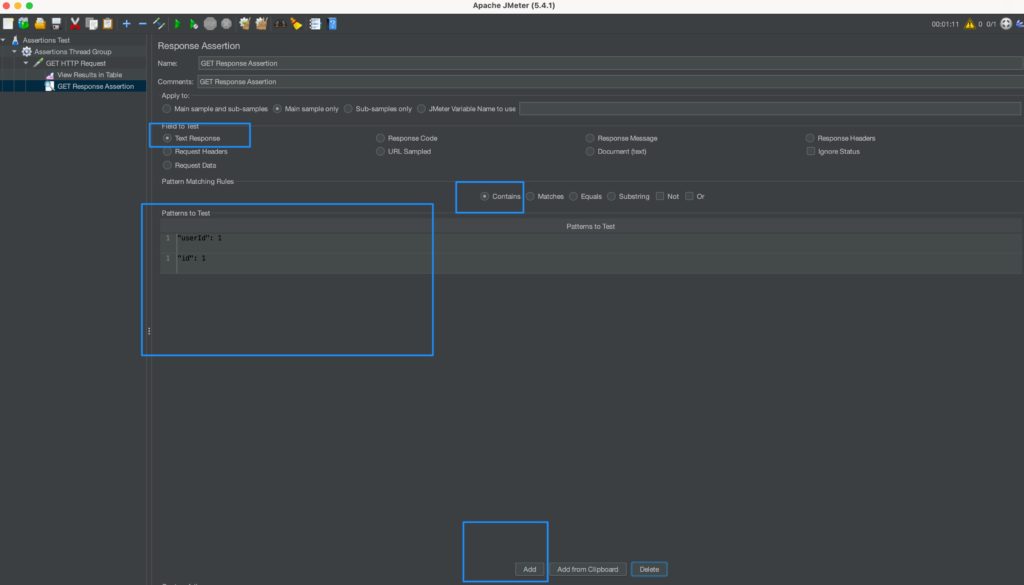
On GET Response Assertions
- Select Text Response
- Select Contains
- Click Add at he bottom and Input the params to test on each row. ie “userId”: 1 and “id”: 1
Running the assertions
Great, now that everyithing is set up, let’s run the assertions and view them in the results tree. Click the green start button and switch to the View Results in Table Tab
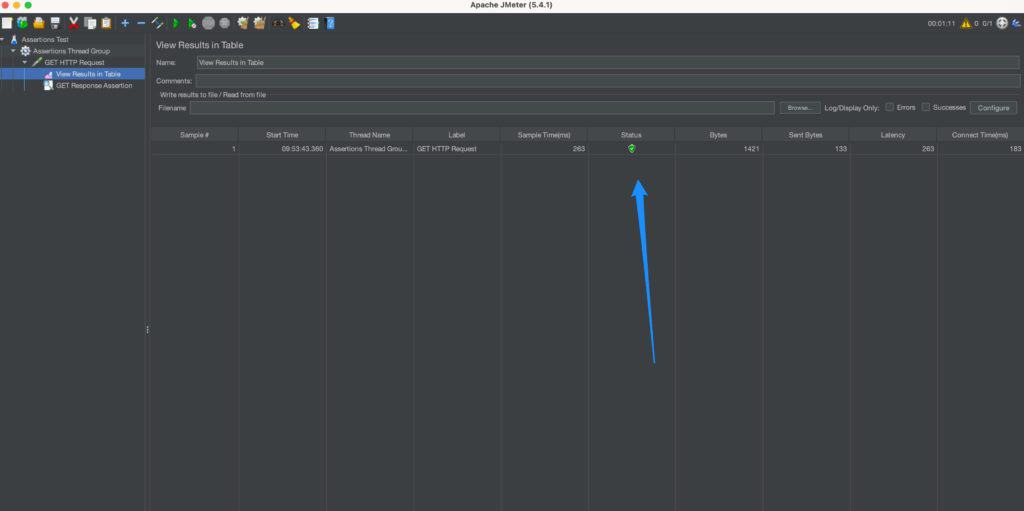
As you can see, the Status is green – indicating a success – meaning that all our assertions have returned true.
To test for a failure, change the assertion parameters under GET Response Assertions and see a failure as below.
Failing the test on purpose
We will give wrong assertions – so that we expect a failure.
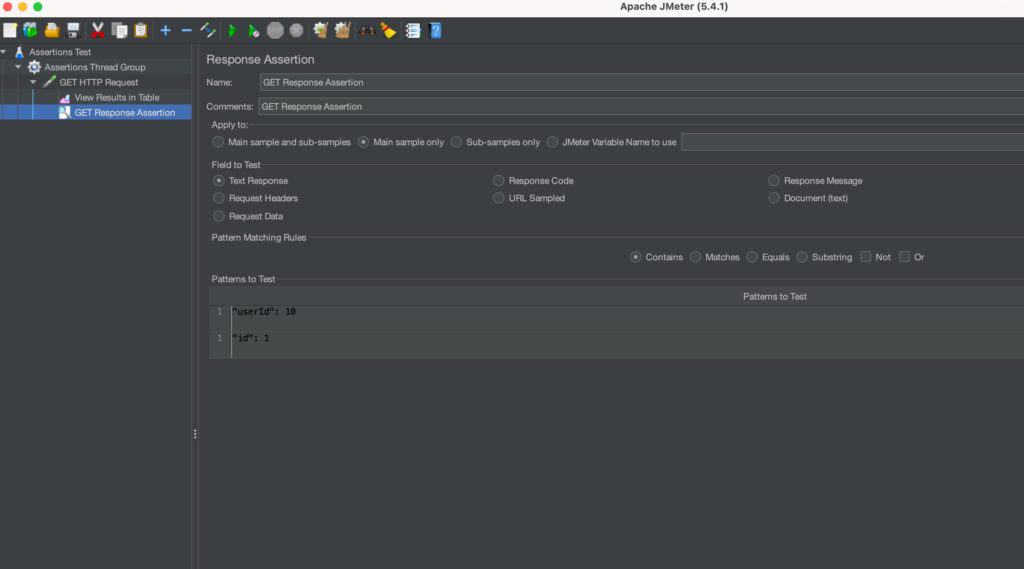
Notice that the “userId” is now 10 and not 1. Let’s run the tests.
Failed results
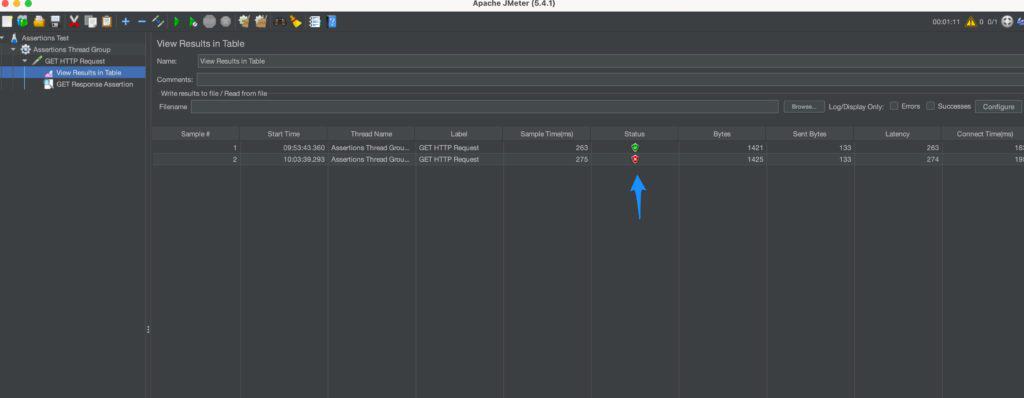
Great!
As expected, notice the second run of the test now fails – since the assertion was incorrect.
Conclusion
That was just a tip of the iceberg on how assertions work on JMeter.
Assertions are very useful for determining if results are within expected ranges or not. Assertions can also be used alongside other elements in batch scripts and loops where they act as guards to stop batches when certain conditions aren’t met. Sometimes it’s more convenient than trying to figure out why something isn’t working by stepping through code line-by-line in debug mode during a test run, which is time consuming and inefficient.
Read more on Why You Need To Have Test Documentation In Software Testing.

